Reflections in Unity
Verbatim extracts from https://learn.unity.com/tutorial/introduction-to-lighting-and-rendering#5c7f8528edbc2a002053b52f
Reflections
Reflection Source
By default, objects in a scene are rendered using Unity’s
‘Standard Shader’. The Standard Shader is a 'physically based shader' (PBS).
This attempts to accurately represent the behavior of light on materials by
mimicking physical properties such as reflectivity and the principles of
‘energy conservation’ which exist in the real world.
When using the Standard Shader, every material has a degree
of reflectivity based on its ‘specularity’, or ‘metalness’. Without hardware
powerful enough to ray trace reflections in realtime we have to rely on
pre-rendering reflections. We do this with a cubemap - a 6-sided image of the
world derived either from the sky, or from a ‘Reflection Probe’ which renders
the environment from a specific point in space, writing the results to a
texture. This is then blended with other lighting and surface data by a
material’s shader in order to approximate the effects of reflectivity, like we
see in the real world.
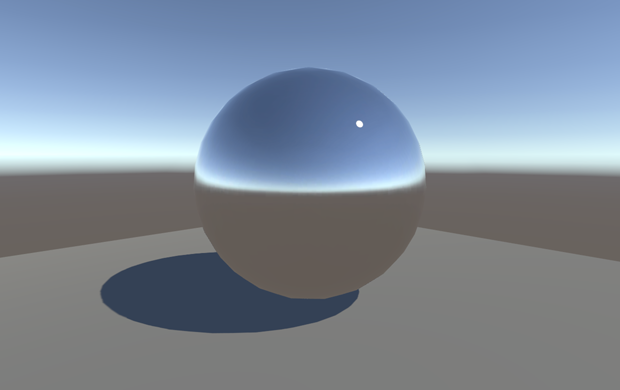
By default, highly Specular/Metal materials in your scene
will reflect the Skybox, defined by the Reflection Source property of the
Environment Lighting Panel. This behaviour can be changed by choosing a
different source, or by adding a Reflection Probe to your scene.
By default, objects in a Unity scene will reflect the
Skybox. However, this behaviour can be changed globally in the Lighting window
using the ‘Reflection Source’ property. The Skybox, or alternatively, a custom
cubemap may be used. This ‘Reflection Source’ can be thought of as a scene-wide
cubemap used by all objects in the scene, unless overridden - by adding a
Reflection Probe
Reflection Probes
Often it is undesirable for objects to simply reflect the
Skybox in a Unity scene. In many instances, objects may be blocked or
‘occluded’ from the sky. They may be indoors or underneath an architectural
feature like a bridge or tunnel . To create more accurate reflections we need
to sample what objects ‘see’ using a ‘Reflection Probe’. These probes render
the world from their position in 3D space and write the results to a cubemap.
This can then be used by nearby objects to give the impression that they are
reflecting the world around them.
A reflection probe can be added via
(GameObject>Light>Reflection Probe).
The position of a Reflection Probe will determine what the
generated cubemap looks like, and therefore what is ‘seen’ in the reflections.
Generally, for performance reasons it is better to use as few probes as
possible. Remember, reflection probes are not meant to give physically accurate
results, but instead give the impression of reflections in the game world. A
few well placed probes throughout your scene will be sufficient in most cases.

Left: Our scene with default reflections. Right: With a
Reflection Probe added.
In the Inspector panel for a Reflection Probe we can set the
‘Type’ property of the probe to choose between ‘Baked’, ‘Custom’ or ‘Realtime’.
It should be noted that Realtime Reflection Probes are extremely detrimental to
performance as we are effectively rendering the scene an additional 6 times for
each probe. There are specific cases where a realtime reflection probe is
required and this expense is justified, but as a general rule, Baked Reflection
Probes are preferable as they are considerably more performant.
Note that GameObjects are only visible to Baked Reflection
Probes if marked as ‘Reflection Probe Static’ from the ‘Static’ drop-down at
the top of the Inspector panel. Conversely, ‘Realtime’ probes render all
visible GameObjects in the world unless a culling mask is applied.


Comments
Post a Comment