Light Types in Unity
Verbatim extracts from https://learn.unity.com/tutorial/introduction-to-lighting-and-rendering#5c7f8528edbc2a002053b530
Light Types
We have now covered some of the project settings which need
to be considered before beginning work on lighting your scenes in Unity.
Hopefully at this point you should have your project configured appropriately
for your target platform (generally Baked GI and Gamma Color Space for mobile,
Precomputed Realtime GI and Linear Color Space for Standalone PC or recent
games consoles).
Let’s move on to looking at the tools available for
achieving the lighting you want in your game.
Directional Lights
‘Directional Lights’ are very useful for creating effects
such as sunlight in your scenes. Behaving in many ways like the sun,
Directional Lights can be thought of as distant light sources which exist
infinitely far away.
Light rays emitted from Directional Lights are parallel to
one another and do not diverge like those from other light types. As a result,
shadows cast by Directional Lights look the same, regardless of their position
relative to the source. This is useful to us, especially when lighting outdoor
scenes.

As Directional Lights do not have a source position, they
can be placed anywhere in your scene without changing the effect of the light.
Rotating the light however does greatly affect the visual result.
With other light types where there is an obvious source
position, such as Spotlights, character shadows will change as the character
moves closer to the light source. This can be a problem when trying to generate
character shadows in interior levels. Directional lights are advantageous in
these situations as shadows remain consistent regardless of proximity to the
light source.
Directional Lights do not diminish over distance. As they
affect all surfaces in your scene (unless culled), they pose a performance cost
when using the Deferred Rendering path. Remember that when using this rendering
technique, the performance cost of a light is relative to the number of pixels
it illuminates. However, despite the cost, performance will at least be
consistent and as such, easier to balance.
By default, every new Unity scene contains a Directional
Light. In Unity 5, this is linked to the procedural sky system defined in the
Environment Lighting section of the Lighting Panel
(Lighting>Scene>Skybox). You can change this behaviour by deleting the
default Directional Light and creating a new light or simply by specifying a
different GameObject from the ‘Sun’ parameter (Lighting>Scene>Sun).
Rotating the default Directional Light (or ‘Sun’) causes the
‘Skybox’ to update. With the light angled to the side, parallel to the ground,
sunset effects can be achieved. Additionally, pointing the light upwards causes
the sky to turn black, as if it’s nighttime. With the light angled from above,
the sky will resemble daylight.
If the Skybox is selected as the ambient source, Ambient
Lighting will change in relation to these colors.
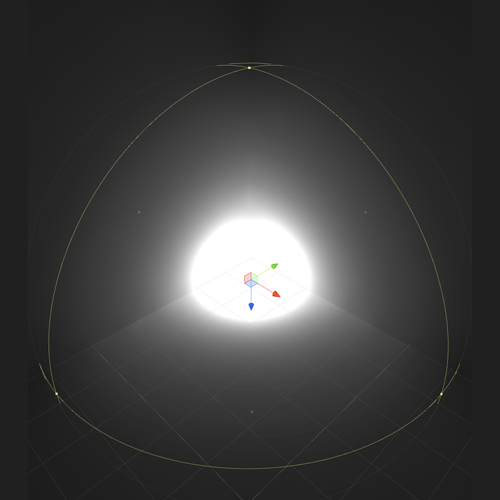
Point Lights
A Point Light can be thought of as a point in 3D space from
which light is emitted in all directions. These are useful for creating effects
like light bulbs, weapon glow or explosions where you expect light to radiate
out from an object.
The intensity of of Point Lights in Unity diminishes
quadratically from full intensity at the centre of the light, to zero at the
limit of the light’s reach defined by the ‘Range’ property of the component in
the Inspector. Light intensity is inversely proportional to the square of the
distance from the source. This is known as ‘inverse square law’ and is similar
to how light behaves in the real world.
Enabling shadows for Point Lights can be expensive and so
must be used sparingly. Point Lights require that shadows have to be rendered
six times for the six world directions and on slower hardware this can be an
unacceptable performance cost.
When adding Point Lights to a scene it’s worth noting that
currently they do not support indirect bounce light shadowing.This means that
the light created by Point Lights will continue through objects and bounce on
the other side unless attenuated by range. This can lead to light ‘leaks’
through walls and floors and therefore lights must be carefully placed to avoid
such problems. This however is not a problem when using Baked GI.
Spotlights
Spotlights project a cone of light in their forward (+Z)
direction. The width of this cone is defined by the light’s ‘Spot Angle’
parameter. Light will ‘falloff’ from the source position towards the extent of
the light’s range, where it will eventually diminish to zero. Light also
diminishes at the edges of the Spotlight’s cone. Widening the Spot Angle
increases the width of the cone and with it, increases the size of this fade,
known as the ‘penumbra’.

Spotlights have many useful applications for scene lighting.
They can be used to great effect as street lights, wall downlights or used
dynamically, for creating effects like a flashlight. As their area of influence
can be precisely controlled, Spotlights are extremely useful for creating focus
on a character or for creating dramatic stage lighting effects
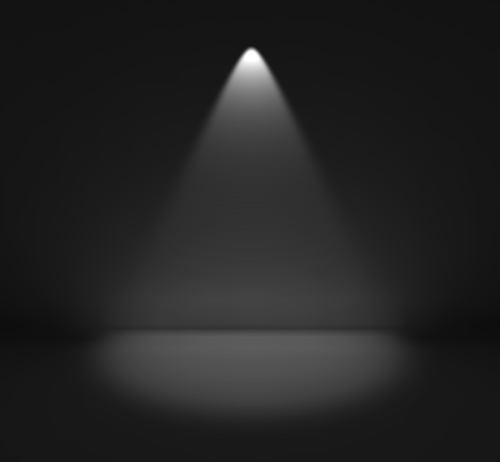
Light will diminish as distance increases from the source.
Notice how light also fades towards the edges of the cone. We call this the
Light’s penumbra and this increases as the angle of the cone increases.
Like Point Lights, Spotlights do not presently support
indirect shadowing when using Precomputed Realtime GI. This means that light
produced by Spotlights will travel through geometry and will bounce on the
other side. Placement therefore needs to be carefully considered.
Area Lights
Area Lights can be thought of as similar to a photographer’s
softbox. In Unity they are defined as rectangles from which light is emitted in
all directions, from one side only - the object’s +Z direction. Presently only
available in Baked GI, these Area Lights illuminate uniformly across their
surface area. There is no manual control for the range of an Area Light,
however intensity will diminish at inverse square of the distance as it travels
away from the source.

Light is emitted across the surface of an Area Light producing a diffuse light with soft shadowing.
Area Lights are useful in situations where you wish to
create soft lighting effects. As light is emitted in all directions across the
surface of the light, the rays produced travel in many directions - creating a
diffuse lighting effect across a subject. A common use for this might be a
ceiling striplight or a backlit panel.
In order to achieve this, we must fire a number of rays from
each lightmap texel in the world, back towards the light in order to determine
whether the light can be seen. This means that Area Lights can be quite
computationally expensive and can increase bake times. However, used well, they
can add a great depth of realism to your scene lighting and this extra
precomputation may be justified. Note that as they are baked only, gameplay performance
is not affected.


Comments
Post a Comment